
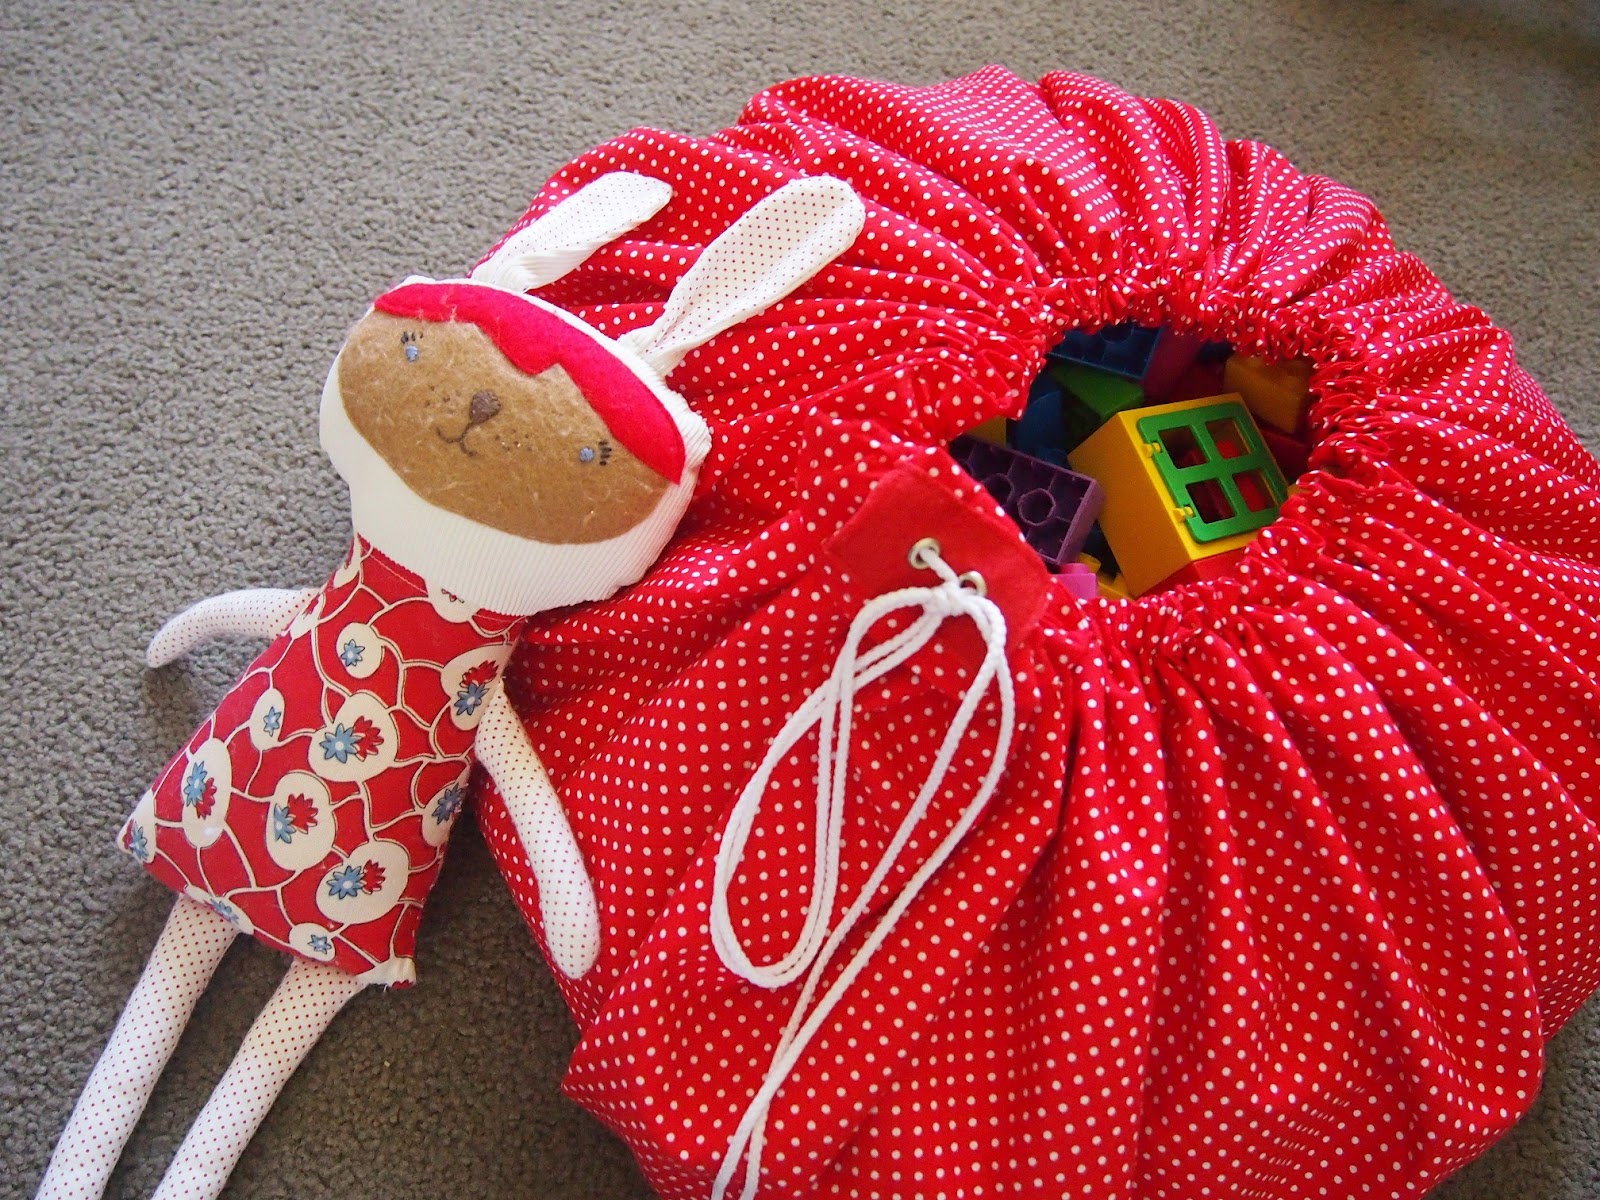
I detest picking up blocks. It drives me absolutely bonkers. Since "losing" the blocks isn't an option, I came up with a solution - it's a play mat that can be drawn up into a storage sack.
I thought I would share how I made it here, in case you have a similar problem and would like to make one too. It also makes a great present if you have someone small in your life!
So to make this you need:
- 2 meters of fabric, cotton is great
- matching thread
- 3 meters of cord
- a scrap of matching felt
- 2 grommets
- a cup of tea and a biscuit (not necessarily required)
You will also need a sewing machine (or a lot of patience), a hammer, pins, a safety pin, string, chalk, and an iron and board.
 |
| I chose a "cheerful red spot" |
 |
| Make sure your cord can fit through your grommets! |
But how to make a huge semicircle? Easy. First find where the middle of your circle will be.

 |

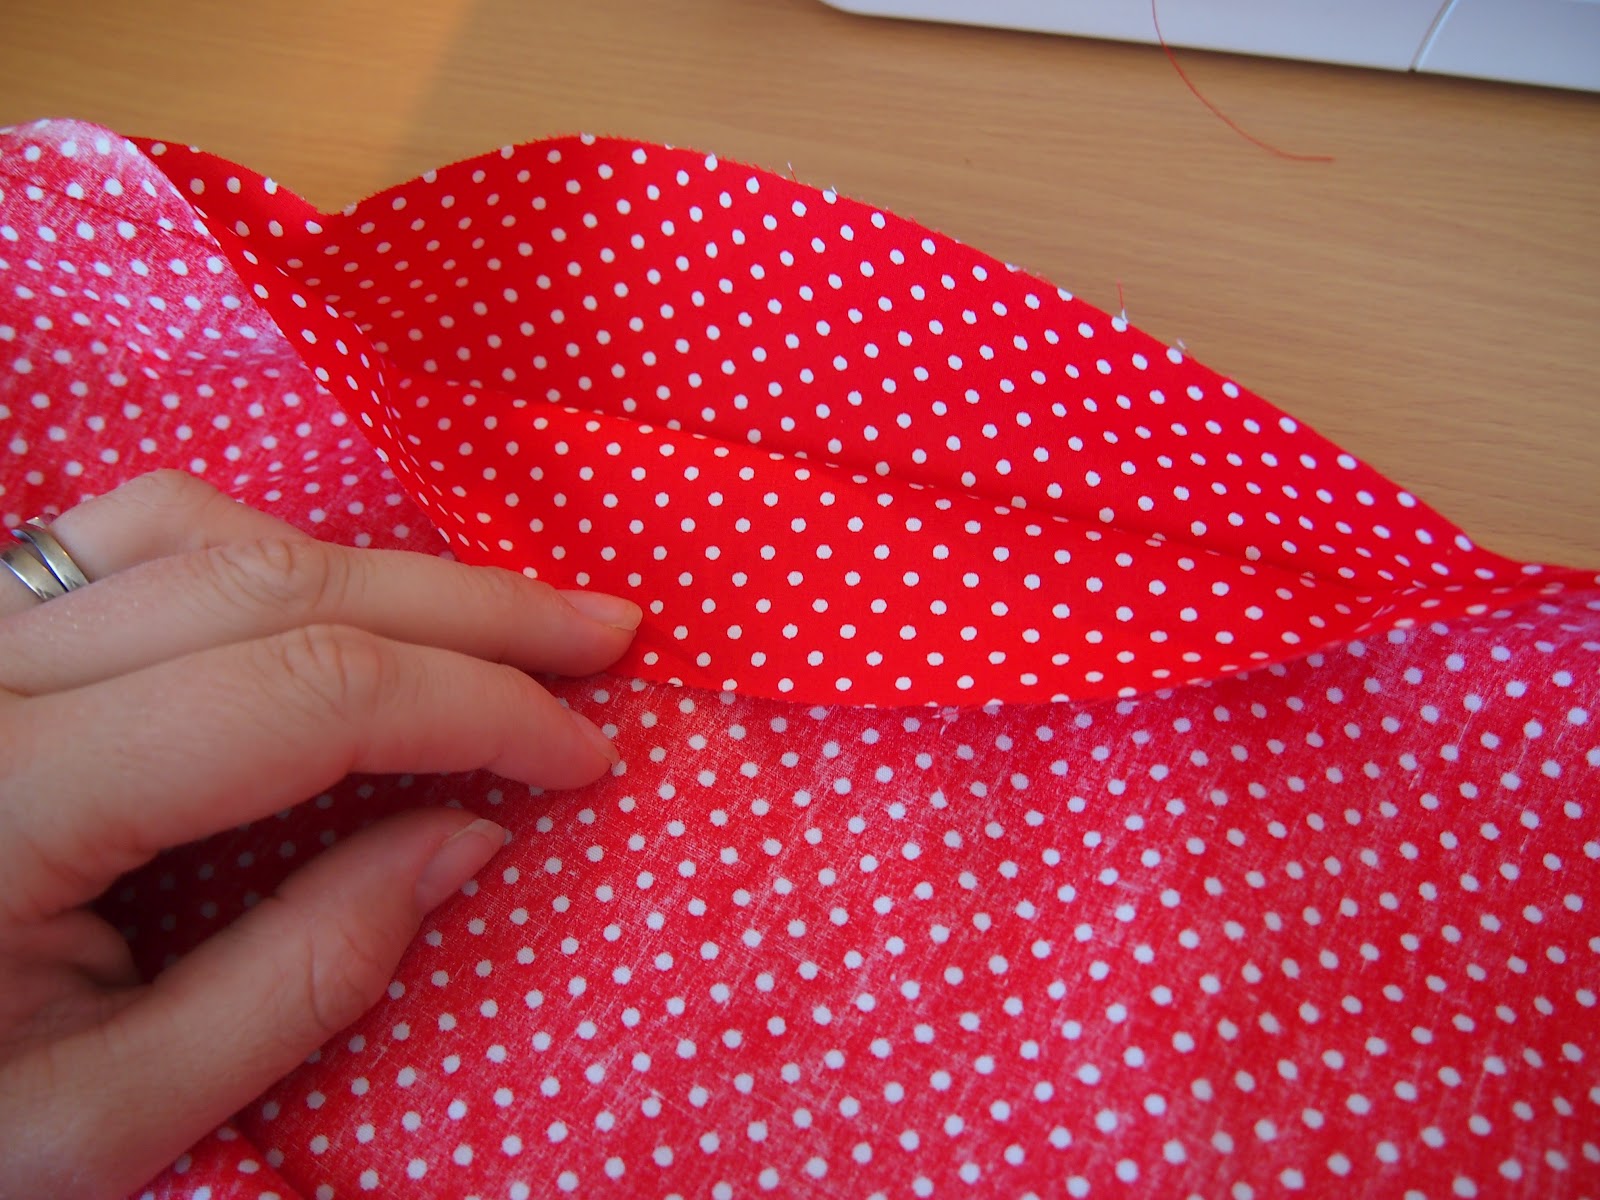
Pin the four layers of fabric together before you cut out the semi-circles. It will hold everything together and stop the layers slipping. Once the two circles are cut out, pin them together right-sides-in.
Sew around the outside of the circles about a 1/4 inch in from the edge. (Too big of a seam and you will have trouble turning it the right way out.) But wait...

Be sure to leave a gap for turning it the right way out! I leave about a six inch gap.
 |
| Mind the gap! |

Now it's time to make the holes for the cord to run through.
Your grommets should have come with a punch kit. You will need your hammer and a firm surface to hit on.

Make a hole for the grommet, and tuck the grommet end through the fabric.

Then assemble the punch around the grommet and give it a gentle whack. I like using the felt to hold the grommets because it is stronger and thicker than the cotton, and if you mess the grommets up you haven't ruined your whole project. Not that I did that the first time or anything... ahem.
When you have put in both grommets, it should look a bit like this:

Trim around the felt and grommet to give a neat rectangle. Be sure to leave enough space on the edges to sew it on. Pin your grommet rectangle in the middle of the gap, to ONE SIDE of the cotton fabric only.

 |
| Pin to one side only |
 |
| Just sew these ones for now |

Now it's time to sew around the outside of the mat again, this time with right-sides-out. Again, sew about 1/4 inch in from the edge. This will help hold everything together when you need to wash the mat. Don't sew over the gap yet!

Sewing long circles can be tedious - don't forget to take a break to snuggle your muse.


Once you are happy with your chalk line, sew around the whole mat again. Don't leave the gap this time - sew a complete circle. Make sure you catch the bottom of the felt rectangle in this seam. Your rectangle should now be sewn on three sides.

Now grab your cord and attach it to a safety pin, then thread it though the channel. Make sure to keep a hold of the other end!
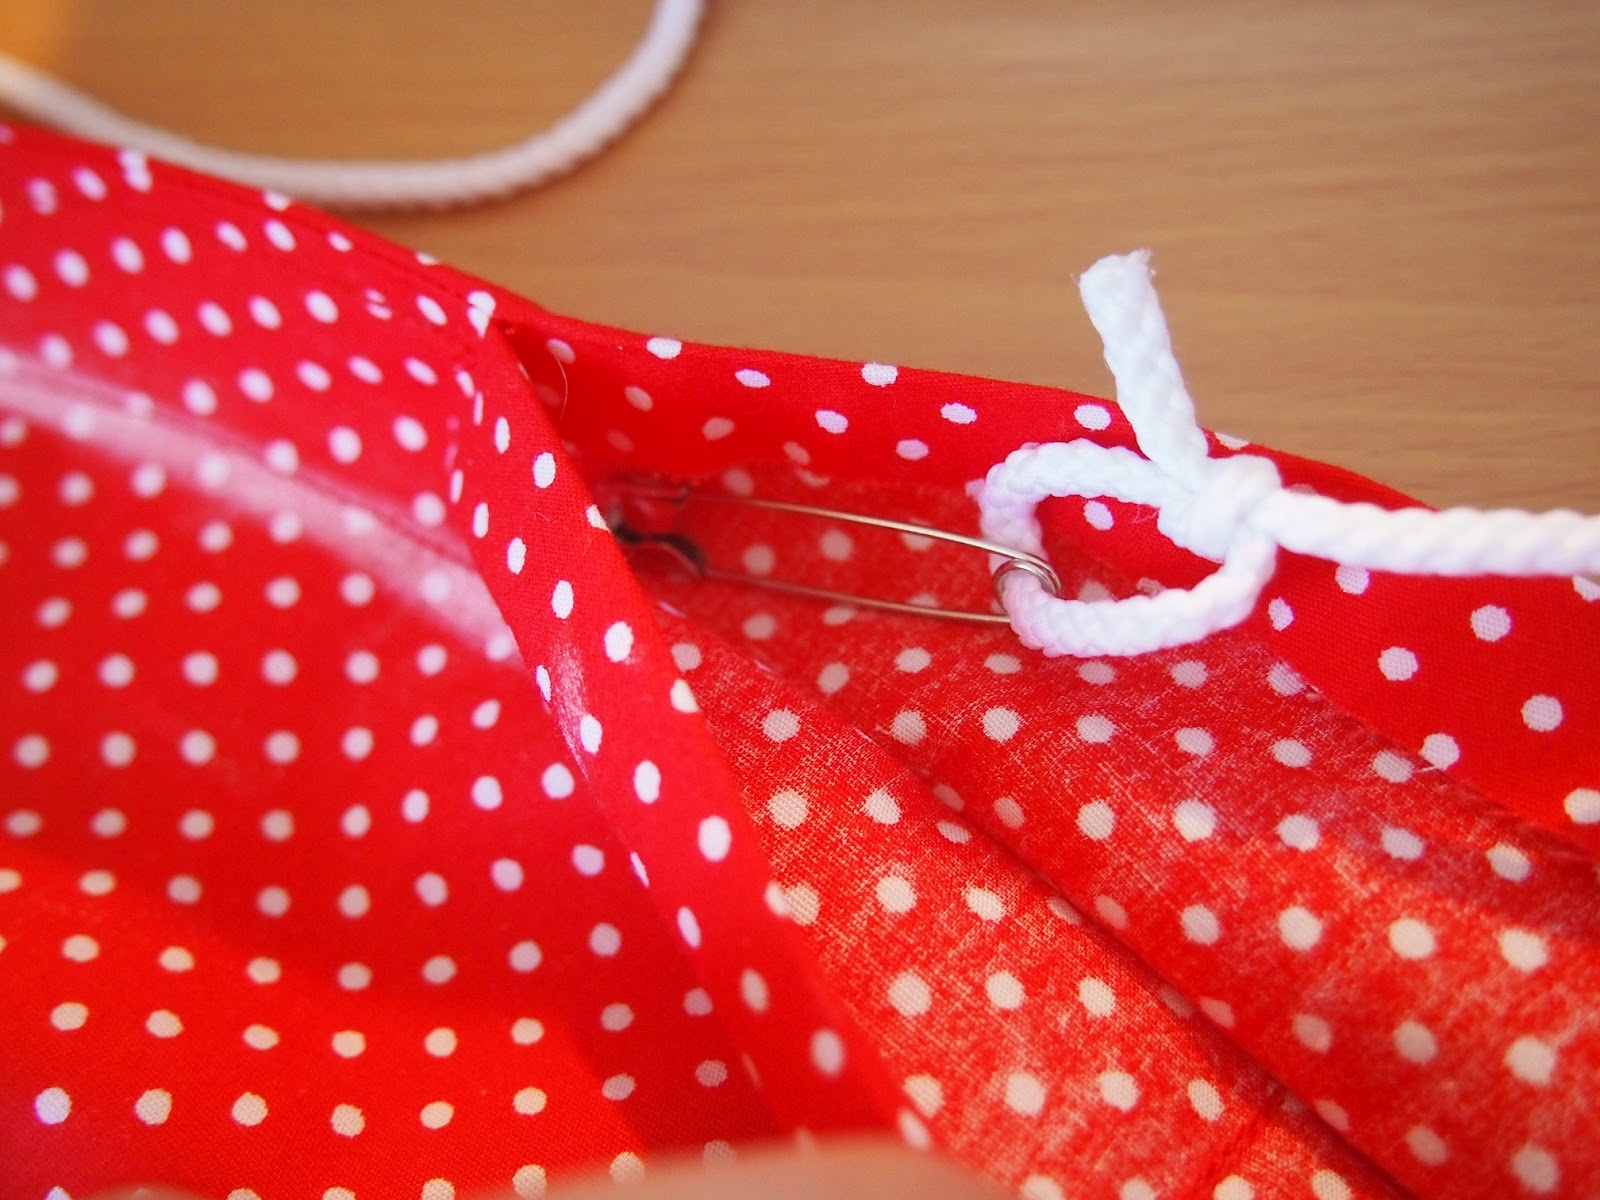
Once you have run it the whole way around, thread it through the grommets and tie the ends together. You can tie it outside the bag, but I prefer to hide the knot inside.


While you are there, sew closed the top of your rectangle too.

And you're done! Your mat is ready to be played on...

...and ready to be packed away.

Feel free to make these mats for you or for gifts, but please don't sell them. If you make the mats a little smaller, it is also a good idea to add a handle. Just sew a rectangle of fabric from right under the felt to 1/3 of the way across the circle. Then when you pack up, you can pick up and go! This project would also be improved by a toggle on the cord, I just didn't have one today.
I hope you found this helpful!
I just wanted to tell you... I love, love, love this!!!
ReplyDeleteHi, I made a play mat similar to this for my nephew about 20 years ago. They are great but I have been told that the long cord is a strangulation hazard and shouldn't be used near children. Personally I don't think it is any more dangerous than a lot of other things kids would find hanging around the average house but we live in a society that sees danger in just about everything. Vicki
ReplyDeleteVicki,
ReplyDeleteYep, the cord could be dangerous if the kids aren't supervised. When the mat is flat the cord is almost completely inside - there is about a centimeter showing. When the mat is tied up, I just chuck it on a high shelf! You are right about it being no worse than other dangers, though!